Description
Please keep in mind that this listing is only for PDF tutorial. You will receive Tutorial in PDF format in Email within 12 hours. You will not be receiving any kit or any physical item with this order.
Owl Pendant Necklace Tutorial, Wire Wrap Tutorial, Wire Wrapping Tutorial, Wire Weaving Tutorial, Wire Wrapped Jewelry Tutorial, Wire Work Tutorial
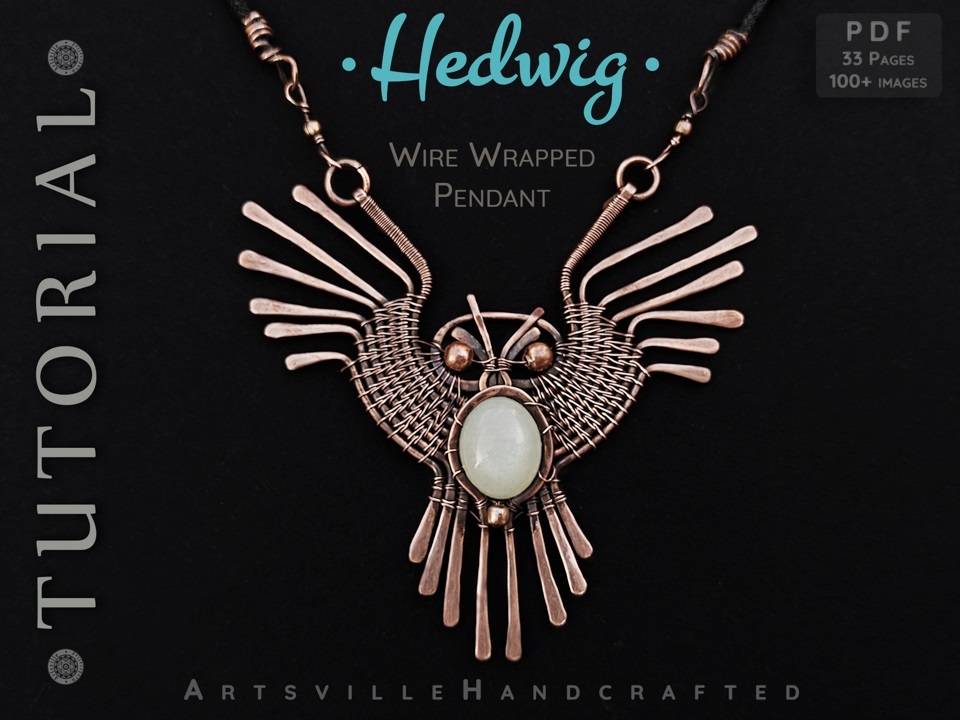
Beautiful — Owl Pendant Tutorial — It looks absolutely gorgeous. This tutorial comes with an attached Pattern File to make the creation easier for you.
Just follow the Pattern design and the steps from the PDF file to create this beautiful pendant.
• This tutorial is based on the size of stone that I am using, the wire lengths will change based on the stone size.
• You need a basic understanding of wire wrapping and weaving and should be able to hand form curves and shapes.
• Hammering is essential to this design. So a Chasing Hammer and Bench Block are required for the execution.
• The size of final pendant created in this tutorial is 2 ¾ ” Height x 3” Width
• Please go through entire tutorial once before starting, to get the overall idea of how the pendant is being created.
• Refer the photos before creating any curve or fold.
• At every point where variation is possible I have listed those for you.
Materials:
Pattern File :
The attached pattern file gives to guidelines for all the shapes used to create this pendant. Print pattern file on A4 size paper. This will be referred as ‘Pattern’ in entire tutorial.
Wires:
1. 18ga (gauge) solid round dead soft copper wire
2. 20ga (gauge) solid round dead soft copper wire
3. 28ga (gauge) solid round dead soft copper wire
Cabochon stone :
Oval shape cabochon with flat back: 12 mm Width x 15 mm Height
Copper beads:
2.5 mm bead : 1 bead
3 mm bead : 2 bead
Tools :
1. Flat nose pliers
2. Flush cutters for cutting the wire
3. 5mm Dowel / bail making pliers
4. Nylon Jaw Pliers
5. Bench Block
6. Chasing Hammer
7. Dowel of 2” diameter to form curves.(I used the smallest portion on my Bangle mandrel)
8. File (to smooth out all cut ends of wire)
9. Marker pen
10. Ruler to measure
11. Sand paper – grits 400,800,1200 ( any three progressive grits will do )
Do not lend, share or distribute this tutorial.
Do not mass produce. If you decide to sell designs created using this tutorial then please give credit to the author and share the link for this tutorial.
Contact me with any question you may have while creating..
– I do not return or exchange PDF tutorials.
Let’s stay connected!!
www.instagram.com/ArtsvilleHandcrafted
www.pintrest.com/ArtsvilleHandcrafted
wire wrapped pendant tutorial, How to Wire Wrapping,wire wrapped jewelry, wire wrapping, wire wrapped pendant, wire wrapping course, learn wire wrapping, jewelry making, jewelry making tutorial, jewelry making technique, jewellery making, learn, wire wrapping PDF tutorial, jewelry making PDF tutorial, PDF tutorial, jewelry making, jewelry making course, jewellery, Wire Tutorial, wire weaving tutorial, wire wrapping tutorial, wire jewelry tutorial, wire work tutorial, wire pendant tutorial, wire wrap tutorial, step by step, wire wrap earring tutorial, copper wire tutorial, wire wrap pattern, how to wire wrap, wire jewelry pattern, how to wire jewelry, wire wrapped bracelet tutorial, jewelry lessons, work from home, wire wrapping lessons, wire wrapped pendant lessons


Reviews
There are no reviews yet.